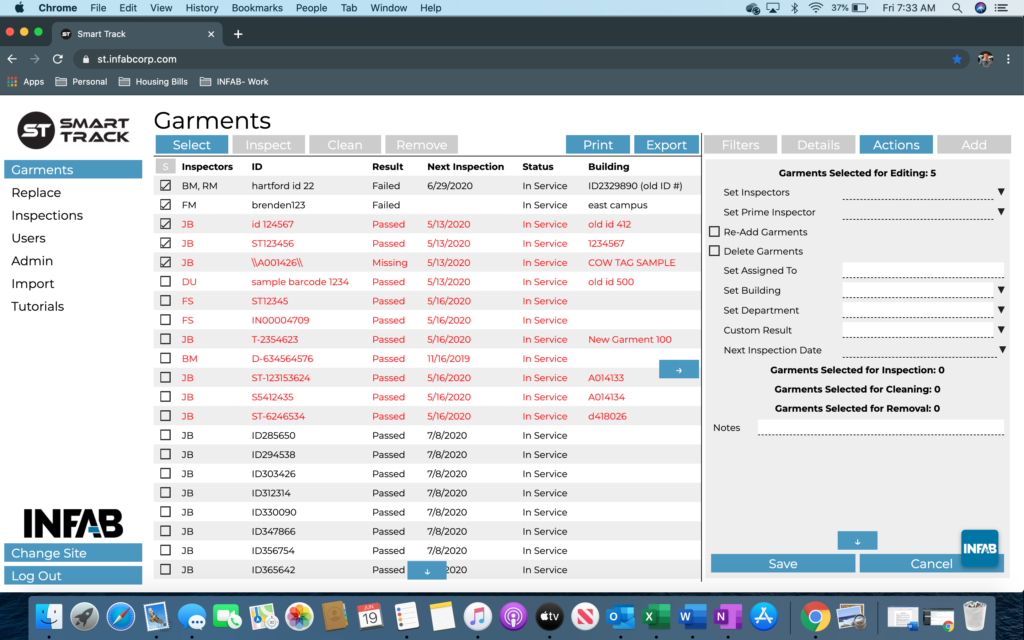
Actions & Details
Step 1: At the top of your header use the “Select” feature to highlight your desired garments.
Step 2: Once selected, your “Actions” tab will auto-populate on the right-hand side of your page. With this feature, we give you a few ways to take action on your garments. For example, you can either assign an inspector or a prime inspector to your product.
Step 3: On the Actions tab, you also have the ability to Re-Add Archived garments back into service. To do this, all you would need to do is check off the box titled “Re-Add Garments”, add any additional notes if applicable, and press “Save”. After you press save, your product will now be marked as active.
Step 4: If you are interested in permanently deleting a garment, follow the same instructions as Step 3. Select the desired garment you wish to delete and press the button “Delete Garments” in the Actions tab. Please note that any garment that is deleted is non-recoverable.
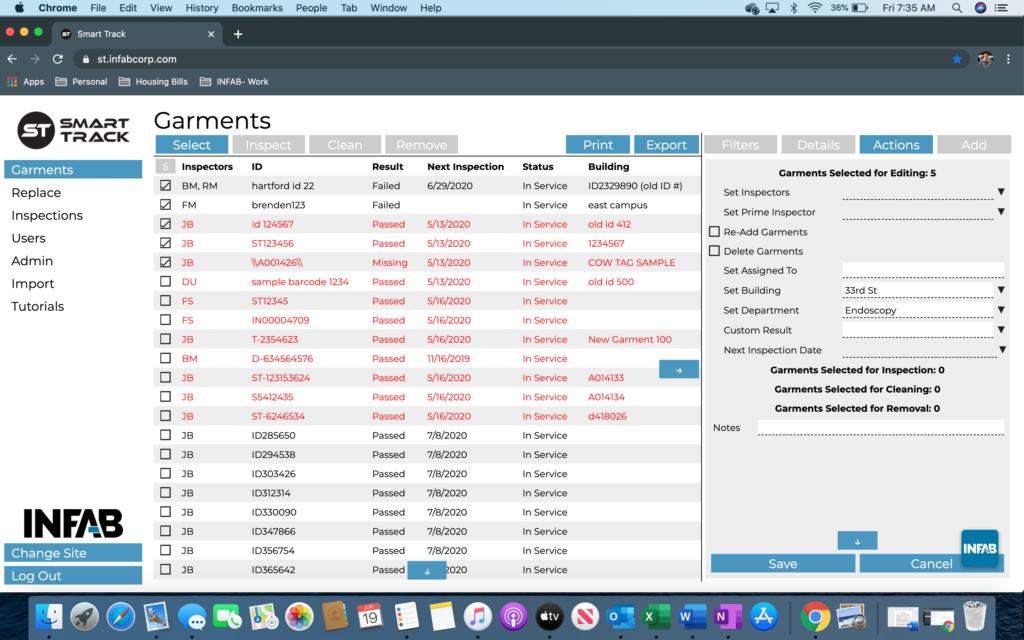
Step 5: In the Actions tab, you can also change the name of who the garment is currently assigned too and edit the department. To do so, you can either utilize the drop-down menu associated with the desired field or type into the box. After you have made your edits, press “Save”.
Step 6: Another useful function is the “Details” tab. From the “Garment” inventory page, if you select a garment that you are interested in, the details section will auto-populate. It will tell you important information about each and every one of your garments.
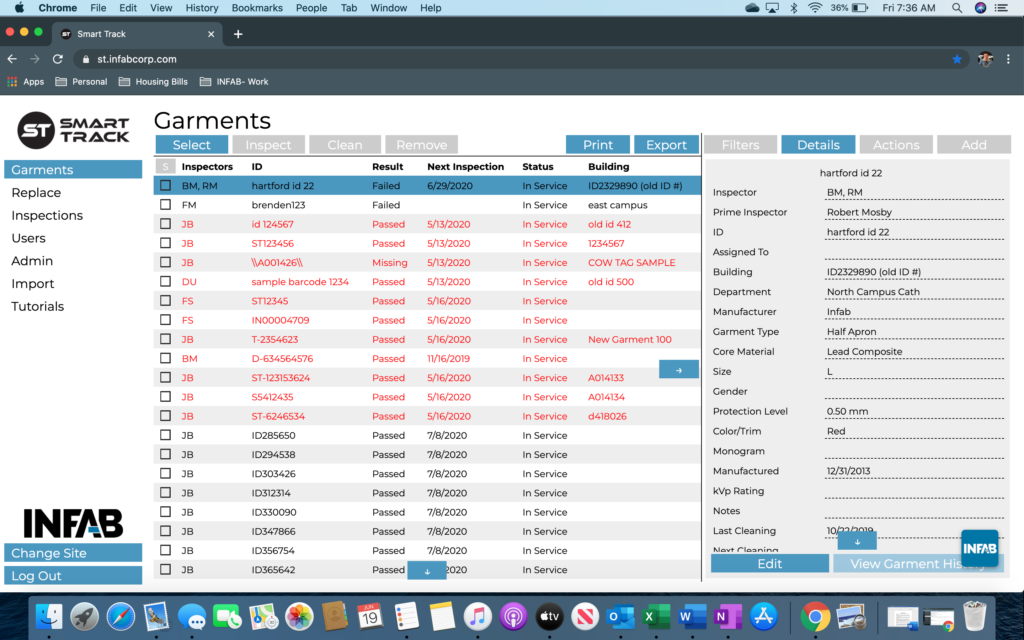
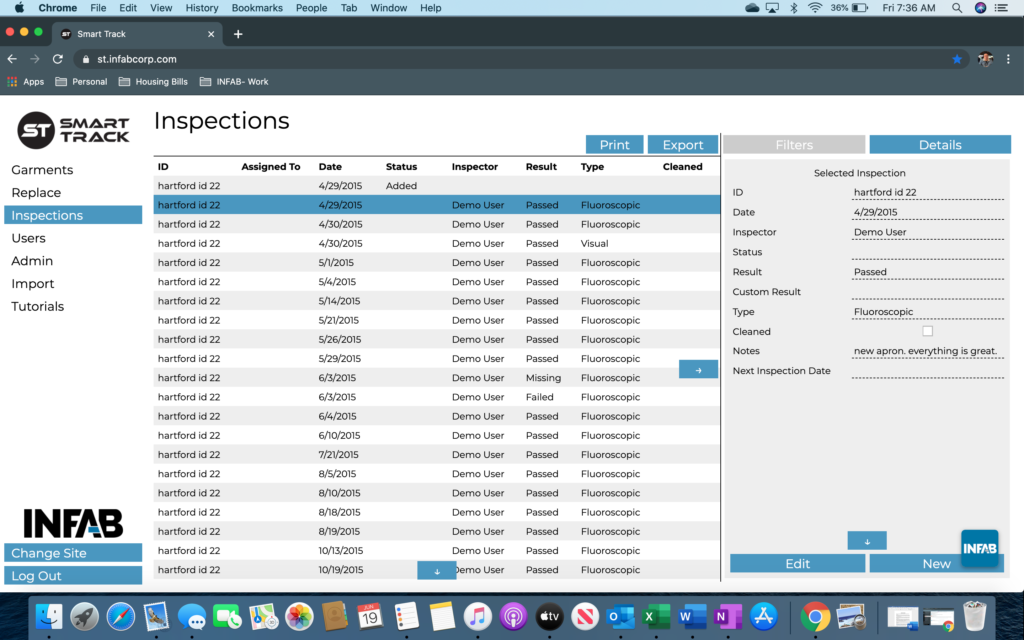
Step 7: Towards the bottom of the page you will see a button titled, “View Garment History”. Select this button.
Step 8: Once you select the button, you will be taken to the “Inspections” page. Here, you can take a closer look at every inspection and action that has been taken on your garment.