How To Add Garments
Step 1: Once you are on the garments inventory page, you will want to select the “Add” garments button. This button can be found on the right-hand side of the page.
Step 2: Once you have selected the “Add” button, you will be prompted to input a garment ID. You can either create an ID, us an ID system that you have used in the past, or you can take advantage of SmartTrack’s Optimization package where we will send you retrofitting tags with ID’s already etched into them. These barcodes can also be added to your existing inventory.

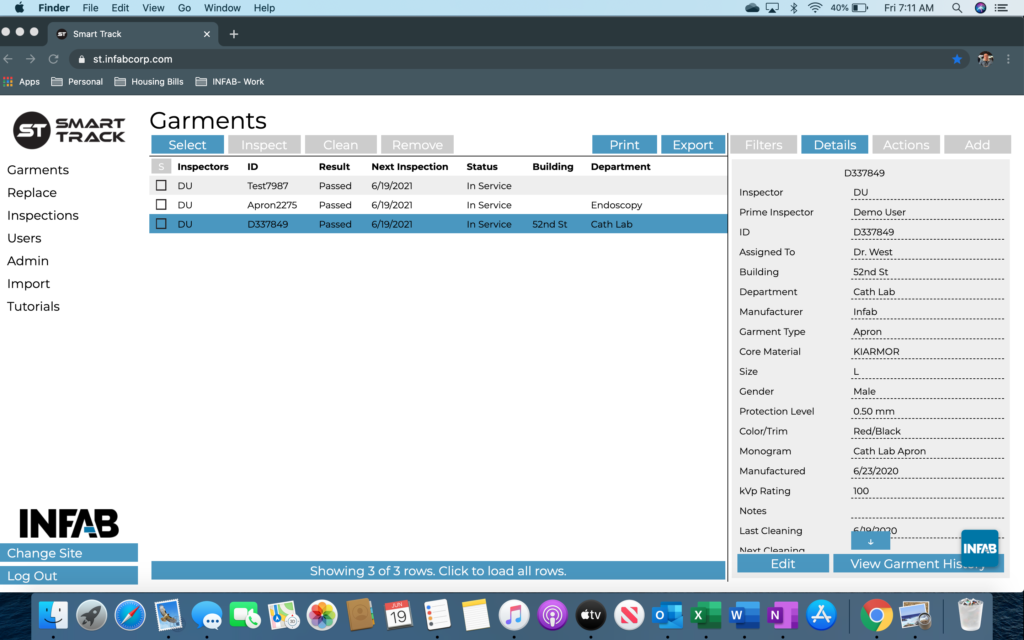
Step 3: Continue with entering the required information for your garment. Some of the required fields are the ID, Garment Type, and Manufacturer of the garment. It’s best practice to add more information if possible, this only helps you when conducting inspections and managing your inventory.

Step 4: After you have successfully completed entering in all of your garment’s information, press “Save”. You will automatically be taken to your “Recently Added” garments page. Here, you will find a complete list of all the garments that you have been added today. This list can be beneficial when trying to locate garments that are new to your system.